Quickstart
This guide will get you all set up and ready to use the HVS Autocomplete widget. We'll cover how to get started using our npm package (opens in a new tab) and how to make your first property search. We'll also look at where to go next to find all the information you need to take full advantage of our powerful Autocomplete widget.
Before you can use the HVS Autocomplete widget, you will need to grab your API key from Percy. Ask for API Key (opens in a new tab)
Use latest distribution
The recommended way of importing the HVS Autocomplete widget into your website is through the package CDN URL.
1. Import widget distribution
Paste the script inside your <head> tag.
<head>
  <script src="https://cdn.jsdelivr.net/npm/@percy.ai/hvs-autocomplete@latest/dist/umd/index.bundled.min.js"></script>
</head>The distribution script of the widget above is using a @latest tag this
means your website will get the latest features and bug fixes always without any action from your side.
But also means you may get breaking changes from time to time, don't panic! we'll let you know in advance before we roll out any breaking changes to the @latest channel.
To avoid surprises you can specify a version number instead of @latest
If you visit the distribution page (opens in a new tab) you will see our latest version.
- 1.1.4
Then you can configure the script to receive new features and bugfixes but breaking changes using @^1
<script src="https://cdn.jsdelivr.net/npm/@percy.ai/hvs-autocomplete@^1/dist/umd/index.bundled.min.js"></script>2. Declare widget in your website
Paste the widget markup inside <body> tag or on any html element from your website.
<body>
  <hvs-widget apikey="YOUR_API_KEY_HERE"> </hvs-widget>
</body>
Ask Percy for API Key
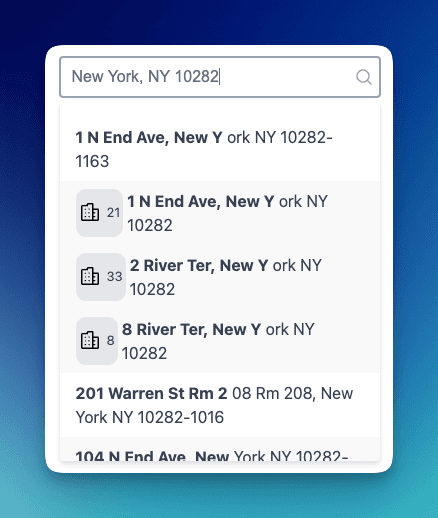
3. Use the widget
At this point you should see the HVS Automcomplete widget rendered in your website.
Learn how to configure the widget settings in the Authentication & Addresses guides